|
|
|---|
|
|
|
|
|
||||||||||||||||||||||||||||||||||||
| Basics | ||||||||||||||||||||||||||||||||||||
|
||||||||||||||||||||||||||||||||||||
| Common Problems | ||||||||||||||||||||||||||||||||||||
|
||||||||||||||||||||||||||||||||||||
| Software Help | ||||||||||||||||||||||||||||||||||||
|
|
|
|
| The screen, what you are
looking at, is a considered a desktop. The concept is no different than a three dimensional
desk. The people at Microsoft have set DEFAULT settings for your
system.
You can choose to allow the program to rule your experience or you can take control of the machine. If you don't happen to like teal as a background color, then change it. |
![]()
Windows has been set to arrange icons (programs)
in a row, starting in the upper left corner, placing the program icons
vertically in the area. If you would like to group them by
category (i.e. games position together in one corner of the screen), turn
off the Auto Arrange option as follows:
|
Move a program icon to a new
location
For this option to work, the Auto Arrange option must
be turned off.
|
| Should you not want a program's shortcut
any more you can remove it from your desktop. Select the program's
icon and do one of the following: It should be noted, this will only remove the program's icon
and does not mean the program itself has been deleted. |
||
| Keyboard. | Mouse |
Toolbar
If available |
| Tap the Delete key | Point to it, RIGHT mouse button click,
select delete from the pop up menu |
|
|
Tap the ENTER key
to confirm the deletion |
Click on the OK button | |
![]()
There are times you might be interested in creating your
own folder on your desktop. (i.e. You would like to have all the games
held in one folder).
|
![]()
| All programs and files within programs are considered windows. When you want a window to take up the entire screen you are maximizing the window. | |
| Method 1 | Method 2 |
|
|
| The chosen window will take up the complete
screen and the maximize button will change into the restore |
|
Restore a window to it's original
size
|
Single click on the restore button |
or | Point to the title bar and double click the left mouse button |
![]()
| When you want a program to temporarily be taken out of view, you are minimizing the window. | |
| Position the mouse pointer on the Minimize button
in the upper right corner of the window
Single click the left mouse button. |
|
| The chosen window will be reduced to an icon and set to the bottom of the screen | |
Restore a minimized window to its previous size
When you are ready to return to the minimized program,
simply do the following
|
![]()
There are many times when a box will open, slap dab, in the middle of what your
look at. If you want to move the window out of the way:
|
|
![]()
When a window is too small to show all available options,
scrolls bars will appear (either Horizontal or Vertical)
|
|
| It should be noted, that when a window is not wide
enough to support the amount of information available, a horizontal scroll bar
will appear at the bottom of the work space.
|
| Mouse convention
When you are editing documents or browsing the web, menu commands can be utilized. |
|
| Position the mouse pointer on the name of the menu item you want to choose. | |
|
|
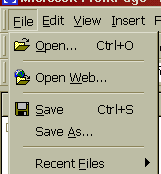
![]()
You can do just about anything with your keyboard.
If you wanted to access the Open dialog box from the example above.
You would do the following...
|
![]()
| Mouse | Keyboard |
| Click the OK button. | Tap the Enter key on your keyboard |
Close a dialog box without making
selections
| Mouse | Keyboard | Toolbar |
| Click on the Cancel button | Press the Esc key on your keyboard (upper left) |
|
![]()
![]()
|
Have a problem and can't
find the answer on our site?
Click Here To
Contact Us. |
|
Want to know what people say about us? Visit our Comments page. |
|
Let us know what you think about our site or want
to offer any suggestions. |
|
Thanks for visiting |
||
|
|
|
|
|
|
|
|
|
|
|
|
|
|
||
|
These links will lead you into our
framed website. It is best viewed at a screen
resolution of 1024 x 768
dpi, however, 800 x 600 dpi will
also work. |
||