Microsoft Word
|
Saving files |
|
|
Microsoft Word
|
|
|
So, you have created your first file, and it's something that's worth keeping. Now we have to tell the computer we want to Save the file. There are, of course, three ways of doing so. You can either:
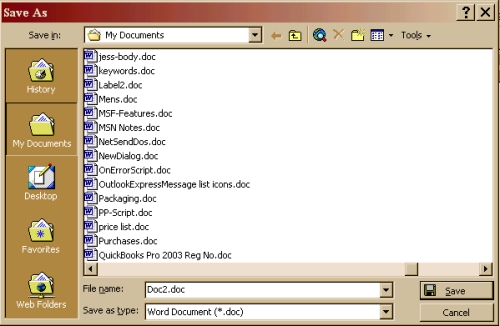
No matter which one you use, if this is the first time you name a file, the ' Save As' dialog box will open. If your file already has a name, no dialog will open, the file will be automatically saved. If you have edited a previously created file and want to keep a copy of the original file, you would go to the 'File' menu option, choose 'Save as" from the list. The window below would open, having the original file name in the 'File name' field. Change the name completely, or, add a letter or number to it. Word 2000 - "Save As" dialog box in the
LIST view
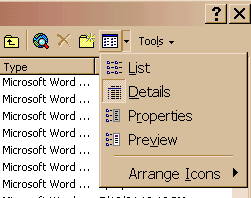
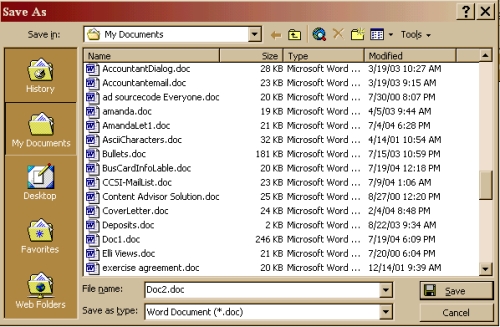
The default view set by Microsoft is the List view. There are no details about the files, only names are visible. If the list is longer than the space provided, a Horizontal Scroll bar will appear within the list area. If you want to know where on your computer the file is stored, choose the drop down button beside the 'Save in' field. The list will open, offering you a pathway to another part of your computer. Even though, we like the job the boys at Microsoft have done with their program, we disagree with some of their default settings. For example, not knowing specific information about your files is not a good thing. Ignorance is not bliss in the land of computers. File details are very beneficial
for you (third button on the right).
For example, if you wanted to sort by date, point to |

![]()
|
Have a problem and can't
find the answer on our site?
Click Here To
Contact Us. |
|
Want to know what people say about us? Visit our Comments page. |
|
Let us know what you think about our site or want
to offer any suggestions. |
|
Thanks for visiting |
||
 |
|
 |
|
|
 |
|
|
|
 |
|
|
|
||
|
These links will lead you into our
framed website. It is best viewed at a screen
resolution of 1024 x 768
dpi, however, 800 x 600 dpi will
also work. |
||